Creating a new foundation for outdoor garage guide, Building fence and wall advice
Steps To Creating A New Foundation For Outdoor Garage
23 February 2022
A strong garage must be developed on a good foundation. Preparing and laying a garage base is normally something that homeowners would rather leave to the experts. Like any other structure, a new garage foundation is essential to the structural integrity of the building above: a good foundation will last for years, but a bad one will bring a lot of problems later on.
Laying the foundation for a garage is rarely considered a do-it-yourself task since it involves the meticulous design, respect for local regulations, and careful consideration of future uses for the final area. During the foundation phase of the garage, amenities such as a filtered drainage system and radiant floor heating must be implemented. Prepare for inspections along the route.
What is Garage Foundation?
A garage foundation is a concrete block upon which a structure is built. It is the physical canvas or ground on which any edifice is built. The foundation evens out the ground, preventing your building from collapsing. Garage foundations are usually made up of poured concrete ground or walls.
How To Create A Garage Foundation
You can build a strong foundation for your outside garage by following these seven simple steps. Every time you park your car, you will be proud to know that you poured your own garage foundation. So, let’s begin with step 1.
Site Preparation
Visit your local municipal authorities and request that any gas, power, or telephone lines near your construction site be marked. Hence, you know where you can safely dig. Layout the border of your garage with a white line. Mark the footprint with thread and wooden stakes pushed into the earth at the edges. The quantity of materials required is determined by the size of the project. Make a note of the measurements and visit a specialist at your hardware store.
Dig Trenches
Dig trenches around the perimeter of your garage for your footings. Local construction requirements will specify the lowest depth and width of your trenches. Still, overall, the trenches should be at least 12 inches – 18 inches broad and at least 18 inches deep. (In regions where the earth freezes, the code may require footings to be at least 48″ below ground level to be below the “frost line” and keep the concrete from shifting.) Remove 3″ to 4″ of soil from the floor area while excavating the footings to allow the concrete pad.
Put Wooden Forming Boards
Place the wooden forming boards in the footing trenches, using wooden pegs to keep them in place. (These planks will be moved once the footings are in place.)
Put Rebar
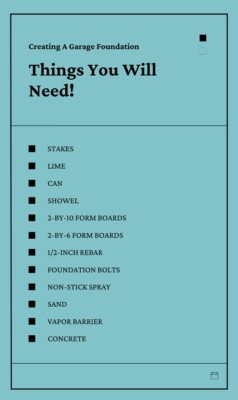
Put 1/2″ rebar horizontally on all footings, using rebar chairs to keep the rebar three inches away from the trench’s bottom edge.
Pour the Concrete
Prepare the concrete for the footings, and then attach rebar every 12 to 16 inches, reaching vertically 8 to 10 inches above the surface, after the concrete has been poured but before it has set. This will connect the foundation walls and footings.
Creating Foundation Walls
Foundation walls are normally 8 to 10 inches high and centered on the footings. Install rebar horizontally in the foundation walls both before and after the concrete is poured. Then, put your bolt two to three inches above the surface into the wet concrete to support the sill plates of the wooden garage walls. For quality bolt selection, visit Fixabolt.
Concrete Floor
Apply a 2- to 3-inch sand or fine gravel layer and compact it. Put a vapor barrier over the sand/gravel layer to keep moisture from your finished garage. Then, rebar in a grid pattern 16 inches on the center across the floor to support your concrete pad. After pouring concrete into the floor area, use a long 2×4 to level the surface and produce a somewhat rough surface that is not too slippery to walk on.
The Drip Cap
- Pouring a solid garage foundation is critical to constructing a stable garage.
- Ensure precision when laying the rebar to ensure that your garage walls do not collapse in the event of an earthquake.
- According to your plans, shovel out the earth from inside the layout, 1 foot wide by 18 inches deep.
- Put the same rebar on top of the footing, maintaining it 3 inches away from the ground and air.
- These bolts will hold the sill plates in place when the moment arises.
Conclusion
You can create a garage foundation if you keep these recommendations in mind. But, keep in mind that you are not required to accomplish it alone. A contractor may assist you in obtaining the foundation you require without all of the worry and work that comes with doing it yourself. Visit https://www.honolulu-concrete.com/ for any more questions you may have about creating a new foundation.
Comments on this guide to Creating a new foundation for outdoor garage article are welcome.
Edinburgh Architecture
Edinburgh Home Demonstrator project
Comments / photos for the Creating a new foundation for outdoor garage advice page welcome


